
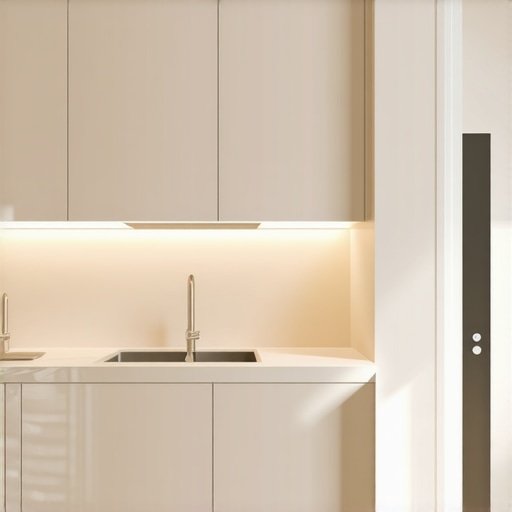
The Lighting Trick That Makes Your Small Kitchen Feel Huge
Forget the myth that white cabinets solve every spatial crisis in a compact kitchen. After fifteen years of tearing down walls and rebuilding luxury culinary spaces, I have seen the same error repeated: homeowners treat lighting as an afterthought, a simple utility to see their cutting boards. This is a five-figure mistake. The real solution to a cramped floor plan is not a sledgehammer; it is the manipulation of the vertical and horizontal planes through high-CRI (Color Rendering Index) optics. Spatial perception is entirely dependent on how shadows are managed. If you leave dark pockets under your upper cabinets or near the floor, the brain perceives those areas as dead zones, effectively shrinking the room. The goal? Eliminate the visual boundaries of the kitchen box.
The Science of Shadow Dissolution
Human eyes are naturally drawn to the brightest point in a room. In most small kitchens, this is a glaring overhead fixture that casts harsh shadows, making your quartzite countertops look dull and the corners feel claustrophobic. To reverse this, we use a technique called ‘Toe-Kick Levitation.’ By installing high-density LED strips beneath the base cabinets, we illuminate the floor. The result? The cabinets appear to float. This adds a sense of depth and volume that a standard ceiling light cannot provide. According to standards set by the Illuminating Engineering Society (IES), residential kitchen task areas require at least 300 to 500 lux, but the quality of that light—the spectral power distribution—matters more than the sheer volume of photons. Cheap LEDs often have a green or purple tint that makes a $5,000 espresso machine look like a plastic toy. High-end lighting with a CRI of 95+ ensures that the deep chrome of your appliances and the rich grain of your cabinetry remain vibrant.
Strategic Linear Layering
Successful lighting requires three distinct layers: ambient, task, and accent. In a tight space, these layers must work together to stretch the visual field. We prioritize linear lighting over puck lights. Puck lights create ‘scallops’ of light—semi-circles of brightness followed by triangles of shadow. This inconsistency creates visual noise. Linear LED channels, however, provide a constant, unbroken wash of light. This is vital when you are working with premium cookware or precision lighting mistakes that age a kitchen. When you wash a backsplash in light from top to bottom, you draw the eye upward, highlighting the height of the ceiling rather than the narrowness of the aisles. This verticality is the secret weapon of the modern architect. We often integrate these systems into the cabinet design itself, ensuring the hardware is invisible while the effect is transformative.
Thermal Loads and Technical Reality
The biggest risk in high-performance lighting is heat. People buy cheap LED tape and stick it directly to the wood. This is a fire hazard and a guaranteed path to component failure. LEDs do not project heat forward, but they generate significant heat at the circuit board. Without an aluminum extrusion to act as a heat sink, the chips will degrade, shift color toward a sickly yellow, and eventually burn out. I have seen countless DIY jobs where the ‘warm white’ light turned into an ‘unhealthy neon’ within six months. Furthermore, you must consider the driver—the transformer that converts your home’s AC power to DC. Hiding these in the back of cabinets without airflow is a recipe for a service call. We mount them in accessible, ventilated areas. If you are also managing a countertop renovation, you must coordinate the electrical runs before the stone is set. Retrofitting these systems is three times as expensive as doing it during the initial build.
The Macro Shift Toward Human Centric Design
The industry is moving toward Tunable White technology. In the next 12 to 24 months, we expect a massive shift in local building codes regarding energy efficiency and light quality. Human-centric lighting adjusts its color temperature throughout the day—crisp 5000K blue-white in the morning to wake you up while you use your espresso machines, and a soft 2700K amber in the evening. For a small kitchen, this means the space feels expansive and energetic during the day and intimate at night. Failing to plan for these smart integrations now means your kitchen will be technologically obsolete before the paint is dry. We are already seeing luxury buyers demand these features as a baseline for property valuation. If you ignore the tech, you are shrinking your future resale pool. Ensure your kitchen has a dedicated circuit or charging hub to handle the modern influx of smart home controllers.
Executive Strategy for Homeowners
My recommendation for any kitchen under 150 square feet is clear: Prioritize the lighting budget over the backsplash material. A $20-per-square-foot tile looks like $100-per-square-foot material under the right light, but the most expensive marble in the world looks cheap in a dark, shadowy room. Invest in a high-quality dimming system that allows you to control the toe-kick, under-cabinet, and overhead lights independently. This flexibility allows you to ‘sculpt’ the room based on the time of day. If you are choosing between a larger fridge and a professional lighting plan, take the lighting. The fridge stays in its footprint; the light changes the footprint of the entire house.
Frequently Asked Questions
What color temperature is best for a small kitchen?
Stick to 3000K for a warm yet clean look, or 3500K if you have a lot of cool tones like grey or blue. Avoid 5000K in residential settings; it feels like a hospital. Do I need an electrician for under-cabinet lighting?
Yes. Hard-wired systems are more reliable and allow for better dimming control than plug-in versions. Are LED strips better than puck lights?
For small kitchens, yes. Linear strips eliminate shadows and create a continuous light source that makes surfaces look larger. How do I hide the wires?
Wires should be run behind the cabinet backing or through a false bottom during the installation process. Proper planning with your cabinet maker is essential.