
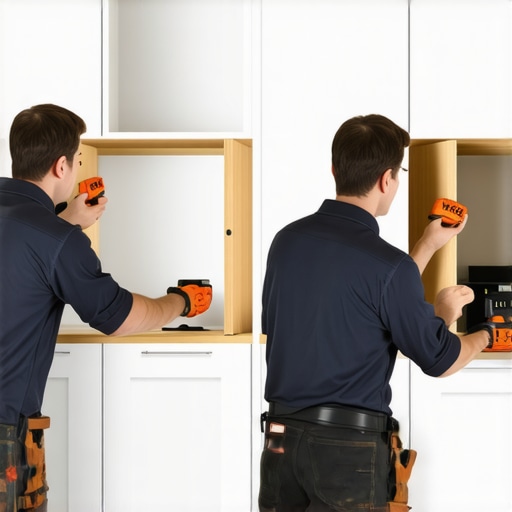
The Most Common Mistake When Installing Shaker Cabinets
Twenty-five years in the luxury kitchen space teaches you one thing: the most expensive failures are usually invisible on day one. When homeowners invest in the timeless appeal of Shaker-style cabinetry, they prioritize the finish, the hardware, and the stone. They ignore the physics of the joint. The most common mistake isn’t a crooked door or a loose hinge; it is the failure to account for wood movement relative to the cabinet’s proximity to steam-producing high-end appliances. After running this company through three market cycles, I’ve seen the same pattern. A beautiful kitchen is installed in June, and by February, the rails are cracking. The result? Avoidable failure. This happens because installers treat Shaker doors like slab doors, ignoring the cope-and-stick joinery that defines the style. If you don’t calculate for the micro-expansion caused by your $4,000 espresso machine or the ambient heat from a high-output air fryer, you are essentially setting a timer on your investment.
The Engineering Reality
Shaker cabinets rely on a floating center panel. In theory, this allows the wood to breathe. In practice, modern finishes often lock these panels in place, turning a flexible design into a rigid one that snaps under pressure. When we install these in premium environments, we have to consider the moisture load from a heavy-duty steamer or a professional-grade range. Most installers skip the moisture-barrier application on the underside of wall cabinets. They assume the factory finish is enough. It isn’t. When the wood expands, it doesn’t just grow; it exerts thousands of pounds of pressure on the stiles. Mastering the secret to perfectly level cabinets on an uneven floor is part of the solution, but the structural integrity starts with the gap. I’ve watched $200,000 renovations fall apart because the installer didn’t leave a 1/32nd-inch expansion gap in the panel groove. It sounds small. It’s the difference between a kitchen that lasts 30 years and one that needs a refacing in five.
Why Standard Methods Fail
The industry standard is to hang the box and move on. This fails to account for the localized micro-climates created by modern luxury gadgets. An espresso machine isn’t just a coffee maker; it’s a localized humidity generator. If that machine sits under a Shaker upper, the constant cycle of heat and steam will cause the lower rail to swell at a different rate than the upper rail. The frame twists. This torsion is what leads to the ‘Shaker Crack’—that hairline fracture at the joint that no amount of touch-up paint can fix. We also see major issues when why most luxury renovations overlook proper ventilation becomes an afterthought. Without a high-CFM hood to pull that moisture out, your cabinetry becomes a sponge. I recall a project in a historic district where the client insisted on tucking their stand mixer and air fryer into a tight corner. Six months later, the doors wouldn’t close. The weight of the equipment was fine, but the heat had warped the frames beyond repair. We had to replace every door in that zone.
Economic Risks and Physical Signs
The cost-benefit of doing this right is massive. A proper installation adds roughly 8-12% to the labor time but prevents a 40% replacement cost down the road. You can smell a failing kitchen before you see it. The smell of fresh adhesive usually masks it at first, but soon, you’ll notice the ‘clank’ of the door hitting the frame. That’s not a hinge adjustment issue. That’s a frame expansion issue. According to reports from the National Kitchen & Bath Association (NKBA), structural cabinet failure is one of the top five reasons for premature kitchen remodeling. Furthermore, when you are dealing with the best countertop material for heavy kitchen appliances, the added weight of quartz or quartzite puts even more stress on the cabinet boxes. If those boxes aren’t reinforced to handle both the stone and the wood movement, the entire system begins to sag. The stiles compress, the joints open, and the luxury aesthetic vanishes.
Market Corrections Ahead
We are seeing a shift in the local market. Homeowners are moving away from the ‘fast-fashion’ of kitchen design and returning to durability. However, as timber sourcing regulations change, the quality of the wood we receive is more variable than it was twenty years ago. This means our installation tolerances must be tighter. In the next 12 to 24 months, I expect more stringent VOC regulations to impact the types of sealants we can use on-site, which makes factory-applied moisture barriers even more critical. If you are planning a renovation, you need to demand a ‘Technical Installation Audit’ from your contractor. Don’t ask if it will look good. Ask how they are managing the hygroscopic expansion of the maple stiles near the dishwasher. If they look at you blankly, find a new installer.
The Executive Verdict
My recommendation is a ‘Buy’ on high-quality Shaker cabinets, but a ‘Sell’ on standard installation practices. If you are in a high-humidity area or a home with heavy culinary use, you must insist on back-priming and mechanical reinforcement of the joints. Use a 5-piece drawer head rather than a slab to match the doors, ensuring the movement is consistent across the entire face. Don’t let a contractor tell you that ‘wood just moves.’ Wood moves predictably, and a pro knows how to direct that movement. If you’re seeing a wobble in your furniture or cabinetry, it might be a sign of broader issues; checking how to fix the wobble in your luxury bar stools often reveals similar structural oversights in the floor-to-cabinet interface. Precision is the only luxury that actually pays for itself.
Industry FAQ
Can I install Shaker cabinets myself?
You can, but you likely won’t account for the torque and expansion variables. Unless you have a moisture meter and a laser level accurate to 1/16th of an inch over 10 feet, call a specialist.
Why is my Shaker door cracking at the corner?
This is almost always due to the center panel being painted or glued into the groove. When the panel tries to shrink in the winter, it pulls the joints apart because it has no room to move.
Does the type of wood matter for Shaker cabinets?
Absolutely. Maple is popular for paint, but it is notoriously ‘fussy’ with moisture. Rift-sawn oak is far more stable but carries a higher price point. Choose based on your local climate and cooking habits.
How do I protect my cabinets from air fryer heat?
Never operate a high-heat appliance directly under a Shaker upper cabinet. Use a pull-out tray or ensure the appliance is positioned toward the front of the counter where the heat can dissipate into the room rather than the cabinet face.