
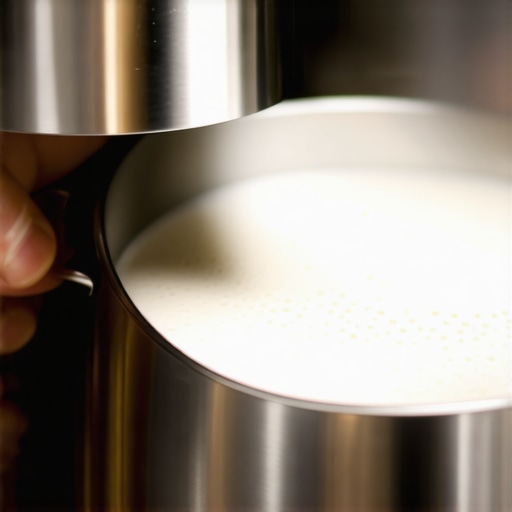
The Barista Trick for Steaming Milk Without the Squeal
Steaming milk is not a passive heating event. It is a violent thermodynamic exchange. That piercing, high-pitched shriek echoing through your luxury kitchen? That is the sound of failure. Specifically, it is the sound of steam entering milk without any air to dampen the acoustic resonance. After 15 years of diagnosing high-end espresso machines and training home baristas, I can tell you that the squeal is more than just an annoyance. It is an indicator that you are scalding the milk proteins rather than texturing them. Achieving that wet-paint gloss requires understanding fluid dynamics, not just turning a knob and hoping for the best.
The secret is the ‘stretch.’ For the first few seconds, the tip of the steam wand must be positioned just at the surface. You should hear a sound like paper tearing. This is air being integrated into the liquid. Without this initial aeration, the steam hits the cold milk and the metal pitcher wall, creating a standing wave of sound. If you miss this window, the milk temperature rises too fast, the viscosity changes, and the window for texture closes. This is precisely the secret to getting silky microfoam for latte art. Once the milk reaches roughly 100°F, you must submerge the wand slightly to create a vortex. The vortex is where the magic happens. It takes those large air bubbles and shears them into microscopic ones, creating the dense microfoam seen in high-end cafes.
The Mechanics of Vortex Stability
In the world of high-performance kitchen appliances, steam pressure is king. Most prosumer espresso machines operate between 1.0 and 1.5 bar. This pressure provides the kinetic energy needed to drive the milk in a circular motion. If the pressure is too low, the milk just sits there and cooks. If it is too high, you lose control. This balance is fundamental to how to get commercial-grade microfoam at home. You need a pitcher that facilitates this movement. A tapered stainless steel pitcher is non-negotiable. The shape allows the milk to roll back onto itself. This rolling action is what incorporates the air you ‘stretched’ into the body of the liquid. According to standards set by the Specialty Coffee Association (SCA), the ideal final temperature for milk is between 140°F and 160°F. Beyond 170°F, the sweetness of the lactose is replaced by the sulfurous notes of denatured proteins. The result? Avoidable failure.
When Thermal Protection Fails
The messy reality of the industry is that equipment maintenance often lags behind technique. A common operational risk I see involves the steam wand itself. If the wand is not purged before use, condensation from the last session is injected directly into your milk, thinning the texture and ruining the mouthfeel. Worse, failing to clean the wand leads to internal milk buildup. This doesn’t just affect flavor; it creates a breeding ground for bacteria inside a $5,000 machine. Mastering how to remove burnt-on milk from your steam wand is a mandatory skill for anyone serious about their coffee. I have seen countless machines, from entry-level units to plumbed-in giants, suffer from why your espresso machine is leaking from the group head or steam valves because of mineral scaling. The hard water in many local areas reacts with heat to form calcium deposits that act like sandpaper on your internal gaskets. Sensory anchors tell the story: the smell of fresh dairy should never be masked by the metallic tang of an unwashed boiler.
Future Proofing the Luxury Coffee Station
The coffee industry is shifting toward precision PID (Proportional-Integral-Derivative) controllers that manage steam temperature to within a fraction of a degree. In the next 12 to 24 months, we will see even more automation in milk texturing, but the ‘Technical Purist’ knows that sensors can never fully replace the hand-on-pitcher feedback loop. Your palm is the most accurate thermometer you own for quick-service workflow. As plant-based milks—oat, almond, and soy—continue to dominate the market, baristas must adapt. These liquids have different protein structures and require lower ‘stretch’ times to avoid separation. Regulatory changes regarding energy efficiency are also forcing manufacturers to design smaller, faster-heating boilers, making the timing of your steam even more critical.
The Final Execution Strategy
If you are looking to elevate your morning routine, do not settle for ‘hot milk.’ Focus on the vortex. If you hear the squeal, pull the pitcher down slightly to let the wand ‘suck’ air for a second. That is the correction. My recommendation is a ‘Buy’ on high-quality, heavy-gauge stainless steel pitchers and a ‘Hold’ on automated frothing gadgets that strip you of control. Strategy: Purge, Stretch, Whirl, Wipe. That is the path to excellence.
How do I stop the squeal immediately?
Lower the pitcher slightly until the tip of the wand breaks the surface of the milk. You need to introduce air (the ‘tearing paper’ sound) to break the acoustic resonance.
What is the best temperature for milk?
Stop steaming when the pitcher becomes too hot to touch comfortably, which is usually around 140°F. Use a thermometer until you develop the ‘feel.’
Does the type of milk matter?
Yes. Whole milk provides the most stable foam due to its fat and protein balance. Non-dairy milks often require less ‘stretching’ and more ‘whirling’ to maintain a cohesive texture.
Why is my foam too thick and bubbly?
You are ‘stretching’ for too long. Only introduce air for the first 3-5 seconds, then submerge the tip to integrate those bubbles into a fine microfoam.