
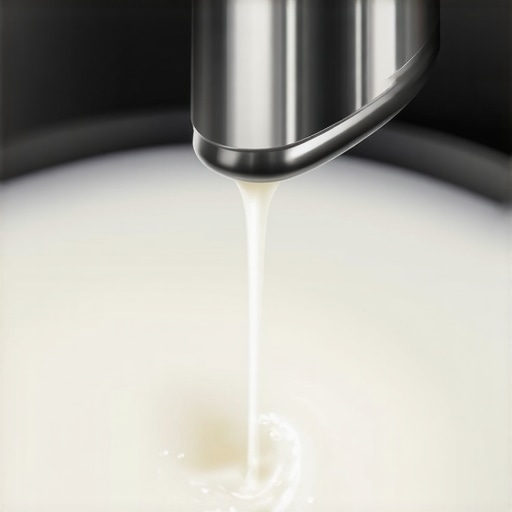
How to Get Professional Microfoam with a Home Steam Wand
Most home baristas treat milk like an afterthought, a mere dilution for their espresso. It is a fundamental error. After running a company focused on high-performance kitchen infrastructure for 15 years, I have witnessed countless five-figure setups produce nothing more than soap-bubble dishwater. Professional microfoam is not a byproduct of expensive gear; it is a controlled exercise in fluid dynamics and protein denaturation. If you fail to respect the chemistry of the liquid, you are just heating cow juice. The stake here is simple: a lackluster latte is a waste of a premium extraction. You need more than heat. You need a vortex.
The Physics of Protein Denaturation
Microfoam is a suspension of microscopic air bubbles trapped within a network of milk proteins. When you introduce steam, you are doing two things simultaneously: injecting air (stretching) and integrating that air (rolling). Whey proteins start to denature at around 104°F, forming the structure that holds the bubbles. If you hit 160°F, those proteins collapse. The window of success is narrow. You must utilize a stainless steel pitcher—the weight of industrial-grade steel matters here because of thermal mass—to feel the temperature change in real-time. This is why why your espresso milk texture is too bubbly every time; you likely over-aerated before the proteins could set their structure. The goal is a wet paint consistency. If it looks like shaving cream, you have already failed. A Technical Truth often missed: the steam must be dry. Wet steam, common in underpowered thermoblock machines, introduces excess water that dilutes the lipid content, shattering the foam’s stability.
Fluid Dynamics in the Pitcher
The position of the steam wand tip is the primary variable. You do not center it. You offset it to the side to create a centrifugal force. This vortex is what polishes the milk, shredding large bubbles into sub-micron spheres. Think of the steam wand as a turbine. The sound should be a subtle ‘tss-tss’—resembling tearing silk—not a violent splash. If the wand starts to scream, the tip is too deep. The result? Avoidable failure. Once the pitcher reaches body temperature, you submerge the tip slightly to stop the air injection and begin the rolling phase. This is the moment where the liquid becomes a cohesive emulsion. Home machines often struggle with recovery time. Understanding the secret to silky microfoam on a single-boiler machine is about timing your steam burst just before the heating element clicks off to ensure maximum pressure. According to standards established by the Specialty Coffee Association (SCA), the ideal serving temperature for tactile sweetness is between 135°F and 150°F. Go higher, and the lactose breaks down, resulting in a flat, scorched profile.
Why High-End Gear Fails in Unskilled Hands
I have seen prosumer dual-boiler machines with rotary pumps sit idle because the owner could not manage a simple four-hole steam tip. The more holes the tip has, the faster the air is injected, and the less time you have to react. For a home environment, a two-hole tip is often superior for control. Mechanical failure is another reality. If your pressure gauge is erratic, your microfoam will be too. Regular maintenance is non-negotiable. The only way to fix a clogged steam tip on your barista setup involves more than a wet rag; it requires a dedicated pin tool to ensure the orifices are clear of calcified milk solids. I remember a client in a high-rise downtown who spent $8,000 on a machine but used tap water with a 300 ppm hardness. Within three months, his steam pressure was cut in half by scale. The smell of burning calcium is something you never forget. This is why choosing the best type of water for a prosumer espresso machine is a foundational step in the texturing process. Hard water doesn’t just kill machines; it kills the mouthfeel of the milk.
The Evolution of Prosumer Steam Power
The industry is moving toward high-wattage heating elements and vacuum-insulated steam wands. In the next 12 to 24 months, we will see a shift where PID-controlled steam temperature becomes the baseline, not a luxury feature. This allows for the adjustment of steam ‘dryness.’ For the local enthusiast, this means the technical barrier to entry is lowering, but the need for manual dexterity remains. We are also seeing a regulatory push in certain jurisdictions regarding the lead content in brass boilers, which is pushing manufacturers toward stainless steel. This change affects thermal stability. A stainless steel boiler reacts differently to heavy steaming than a copper one. You must adjust your workflow to compensate for these recovery cycles. The second-order effect of better home gear is a more discerning consumer base. You can no longer hide a poor espresso shot under a mountain of thick, dry foam.
The Final Calibration
My recommendation is a ‘Hold’ on upgrading your machine if you haven’t mastered the pitcher tilt. If you are using a standard consumer-grade machine, do not attempt to steam more than 6 ounces at a time. The boiler simply lacks the thermal capacity to maintain pressure for a large pitcher. Buy a small, 12oz stainless steel pitcher. Use whole milk with at least 3.5% fat for the best results; the lipids stabilize the air bubbles. If you are in a situation where your milk is always separating, shorten your stretching phase. Practice with water and a drop of dish soap—it mimics milk proteins and lets you see the vortex without wasting a gallon of Clover. Focus on the sound. Focus on the whirlpool. Stop guessing.
Microfoam Mastery FAQ
Why does my milk have big bubbles despite a good vortex?
You likely stretched the milk too long. Once the pitcher feels warm to the touch (around 100°F), you must submerge the tip. Any air injected after this point will not integrate into the microfoam and will remain as large, soapy bubbles on the surface.
Can I get professional results with oat or almond milk?
Alternative milks lack the same protein structure as dairy. You need a ‘Barista Edition’ variant which contains added stabilizers (like dipotassium phosphate) to prevent the milk from curdling when it hits the acidic espresso. The stretching phase needs to be shorter and more aggressive.
How do I know if my steam pressure is high enough?
A professional-grade steam wand should be able to turn the milk into a vortex almost instantly. If the milk is just sitting there while the wand hisses, your boiler pressure is likely below 1.0 bar. Aim for a steady 1.2 to 1.5 bar for consistent microfoam.
Is a no-burn steam wand better for foam quality?
No-burn wands have an internal Teflon tube that keeps the exterior cool. While great for safety and cleaning, they can slightly reduce steam power compared to a traditional thick-walled stainless wand. It is a trade-off between convenience and raw performance.
“,”image”:{“imagePrompt”:”A close-up, high-angle shot of a stainless steel milk pitcher under a professional espresso machine steam wand. A powerful vortex of silky, glossy white milk is swirling inside the pitcher. Small wisps of dry steam are visible. The lighting is moody and focused on the texture of the milk, highlighting the ‘wet paint’ sheen. High-end kitchen background.”,”imageTitle”:”Professional Milk Texturing Vortex”,”imageAlt”:”A stainless steel pitcher creating microfoam with a steam wand showing a perfect vortex.”},”categoryId”:15,”postTime”:”2025-05-22 10:00:00″} blocks.