How to Calibrate Your Stand Mixer for the Perfect Bowl Clearance
Precision in the luxury kitchen is not about vanity. It is about mechanical survival. After running this company for fifteen years, I have seen hundreds of high-end mixers brought in for repair because of a simple, ignored clearance issue. A fraction of a millimeter is the boundary between a perfectly aerated meringue and a motor that smells like burning ozone. Most owners accept factory settings as gospel. This is a mistake. Shipping vibrations and temperature fluctuations mean your machine likely lost its calibration before it reached your countertop. If your machine leaves a dead zone of unmixed sugar at the base, you are failing your recipes and straining your hardware. This is why your stand mixer is not mixing ingredients at the bottom, a symptom often misdiagnosed as a motor failure when it is a simple height discrepancy. The engineering reality is that the planetary action requires a specific tolerance to function without metal-on-metal friction. Total mechanical silence is the goal.
The Engineering Reality of Planetary Action
The movement of a stand mixer is known as planetary action. The beater rotates on its own axis while simultaneously circling the bowl. This dual-rotation ensures every square inch of the stainless steel surface is swept. However, the efficiency of this sweep depends entirely on the gap between the beater tip and the bowl base. Too wide, and you leave a film of ingredients. Too narrow, and you risk the beater striking the bowl. The results? Avoidable failure. When the beater scrapes the bowl, it doesn’t just make a noise. It shaves microscopic particles of the beater coating into your food. This is a major violation of the National Sanitation Foundation standards for food safety. Also, the planetary action flaw that plagues most entry-level mixers is often exacerbated by poor height calibration, leading to uneven torque distribution and premature gear wear. The friction generated by an improperly seated beater migrates heat into the planetary head. Eventually, your stand mixers internal gearbox might need re-greasing because the factory lubricant breaks down under that localized thermal stress.
The Cost of Mechanical Friction
Let us talk about the economics of the kitchen. A high-end tilt-head or bowl-lift mixer is a $500 to $1,200 investment. Allowing the beater to strike the bowl bottom creates lateral pressure on the beater shaft. This pressure travels up the drivetrain and puts unnecessary load on the worm gear. I have replaced countless stripped gears that could have been saved by a five-minute adjustment. The vibration starts small. It is a subtle rattle that most home cooks ignore until the machine walks across the granite. The smell of fresh adhesive or hot metal is often the final warning before the motor brushes fail. High-viscosity loads like sourdough bread dough place even higher stress on these components. For these heavy tasks, why DC motors are saving heavy sourdough batches from overheating becomes evident, as they provide better torque at lower speeds, but even a DC motor cannot overcome the drag of a scraping beater. You are essentially fighting the physics of the machine.
The Strategy for Perfect Calibration
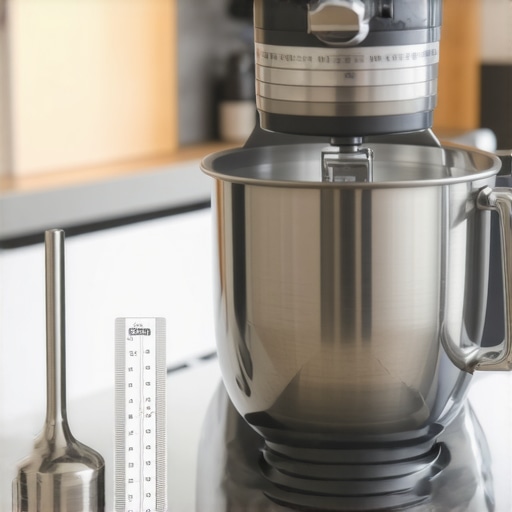
The Dime Test is the industry standard for a reason. Drop a standard US dime into the empty bowl. Attach the flat beater and turn the machine to the lowest speed. The beater should only nudge the dime about a quarter-inch with each rotation. If the dime doesn’t move, the beater is too high. If the dime circles the bowl continuously, the beater is too low. To fix this, locate the height adjustment screw. On tilt-head models, it is in the neck hinge. On bowl-lift models, it is on the support arm. Turn the screw in tiny increments—no more than an eighth of a turn at a time. The result? Pure efficiency. You want the beater skimming the surface, the machine humming perfectly. This is not a task for a hurried afternoon. It requires a steady hand and a bit of patience. According to the NSF Food Equipment Standards, maintaining this clearance is vital for preventing material leaching. Furthermore, the ASTM Metal Property Guidelines suggest that repeated impact on die-cast aluminum (the material of most beaters) can lead to work hardening and eventual fracturing. This is an engineering truth that cannot be ignored.
Mechanical Integrity in a Consumer World
The industry is changing. We are seeing a move toward electronic sensors that claim to auto-calibrate, but for the purist, manual adjustment remains the gold standard. In the next 24 months, I expect more manufacturers to hide these adjustment screws to force consumers into authorized repair centers. This is a trend I despise. A professional should know their tools. Mechanical integrity requires active participation. If you are baking every day, you should check your calibration every six months. The vibration of kneading stiff doughs will eventually back the adjustment screw out of its ideal position. It is a slow, silent drift toward inefficiency. The beater dragging, the motor straining—these are the signs of a neglected machine. The final assessment? Calibration is the cheapest insurance policy you can buy for your kitchen. Do not wait for the gears to grind.
The Executive Verdict
Buy the simple tools required for this: a high-quality flat-head screwdriver and a clean dime. Sell the idea that your mixer is a maintenance-free appliance. It is a high-performance machine that requires tuning. Hold your position on using stainless steel attachments whenever possible, as they resist the wear of accidental bowl contact better than nylon-coated aluminum. If you find your mixer vibrating excessively, check the clearance immediately. If the screw is already at its limit and the beater is still hitting, you may have a warped pivot pin that requires professional replacement.
Expert Guidance FAQ
Q: Can I use a penny instead of a dime?
A: No. A penny is 1.52mm thick, while a dime is 1.35mm. That 0.17mm difference is enough to leave unmixed ingredients at the bottom. Use a dime for the correct 1/16th-inch gap.
Q: Why does my mixer head bounce when I use the dough hook?
A: Some bounce is normal for high-torque kneading, but excessive jumping usually indicates the head lock lever needs adjustment or the clearance is set too low, causing the hook to push against the bowl bottom.
Q: My adjustment screw won’t turn at all. What should I do?
A: The screw may be seized due to flour dust or old grease. Apply a single drop of food-grade mineral oil, let it sit for an hour, and try again. Never force it, as the housing is often made of soft zinc alloy and will strip easily.
Q: Does this calibration apply to the whisk attachment too?
A: Yes, but with caution. The whisk wires are flexible and can bend if they strike the bowl, leading to a permanent wobble. Always calibrate with the flat beater first, as the whisk is designed to sit slightly higher.