
How to Calibrate the Burrs on a New Coffee Grinder
Buying a high-end espresso grinder feels like an endgame for your luxury kitchen. You unbox the heavy steel, admire the finish, and assume the factory set it perfectly. That assumption is a mistake. Most manufacturers ship grinders with a safety buffer that prevents the burrs from touching, but this buffer often places the ‘fine’ setting miles away from true espresso requirements. After fifteen years spent repairing and optimizing commercial coffee hardware, I can tell you that an uncalibrated grinder is just a very expensive paperweight. You are looking for the ‘True Zero’—that precise moment where the burrs start to kiss. Miss this, and you will waste pounds of expensive beans chasing a phantom extraction profile. The stakes? Sour, watery shots and a motor that works harder than it should. The result? Total mechanical disappointment.
The Engineering Logic of Burr Alignment
Calibration is not just about making the dial line up with the numbers. It is about physical parallelism. Flat burrs, common in premium espresso machines, rely on two discs being perfectly aligned to within microns. If they are not parallel, you get a bimodal distribution of coffee particles—some too big, some like dust. This creates uneven resistance. Water follows the path of least resistance. You get channeling. To fix this, we look at the adjustment collar or the internal calibration screw. Understanding the relationship between the pitch of the threads and the movement of the upper burr carrier defines your success. It is a game of tolerances. When we talk about the easiest way to calibrate your burr grinder for consistent extractions, we are talking about mechanical synchronization. A high-torque motor is useless if the burrs are canted. You want a uniform shave of the bean, not a crush. This mechanical precision is why why espresso machines with PID controllers result in better tasting coffee; they rely on a consistency that only a calibrated grinder provides.
The True Zero Point
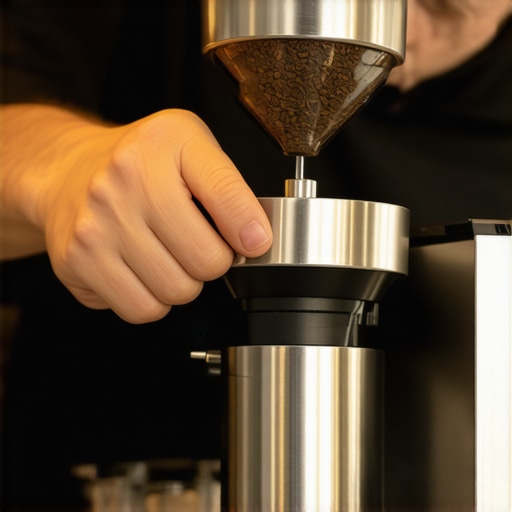
The first step is finding the ‘chirp.’ Remove the hopper. Clear any factory-test coffee dust. Turn the grinder on. Slowly, and I mean incrementally, rotate the adjustment collar toward the fine setting. You are listening for a faint, metallic ‘tink-tink’ or a steady hiss of steel hitting steel. That is your True Zero. Stop immediately. If you force it, you will dull the cutting edges or, worse, gall the metal. Once you find this point, back it off slightly. Many high-end grinders allow you to physically move the ‘0’ marker on the dial to match this physical reality. This process is messy. It requires patience and a steady hand. You will feel the vibration through the adjustment ring. It is the weight of the industrial grade steel fighting against the rotation. This is the foundation of flavor. Without this reference point, your dial numbers are arbitrary. Once set, you must also learn the proper way to clean a burr grinder without ruining the calibration, because oil buildup will eventually shift your zero point by a few microns.
Operational Risks and Mechanical Failure
There is a risk in this pursuit of perfection. Stripping the threads on a brass adjustment collar is a $400 error. I’ve seen enthusiasts get aggressive and seize the burr carrier entirely. The smell of hot copper from a stalled motor is a scent you don’t forget. If your grinder starts to labor or the sound changes from a sharp whine to a low growl, you’ve gone too far. Heat is the enemy. Burrs expand when hot. If you calibrate a hot grinder, your settings will drift as it cools. Always calibrate at room temperature. Also, consider the bean type. Oily, dark roasts require a different physical gap than dense, light-roast beans. If you are struggling with static during this process, check out why your coffee grinder makes so much static and how to stop it. Static is often a sign of friction from misaligned burrs or overly tight tolerances during the initial setup phase.
Market Trends and Precision Engineering
The industry is moving toward ‘Zero Retention’ and ‘Auto-Calibration.’ In the next 18 months, expect to see more grinders using load sensors to detect burr contact automatically. We are moving away from manual collars toward digital steppers. This shift is driven by the demand for repeatability in the home luxury kitchen. Consumers are tired of wasting 20 grams of coffee every morning just to find the ‘sweet spot.’ However, even with digital sensors, the physical alignment remains a manual chore for the purist. Regulation-wise, we are seeing more pressure from the Specialty Coffee Association (SCA) for manufacturers to provide better documentation on burr parallelism out of the box. The ‘Operational Truth’ is that no matter how smart the software gets, the physical interface between steel and bean remains an analog problem.
The Executive Verdict
If you just bought a new grinder, do not trust the factory setting. My recommendation is a ‘Calibrate-then-Season’ strategy. Find your True Zero first. Then, run 2-5 pounds of cheap, stale beans through it to smooth out the factory burr edges. Only then should you start dialing in your expensive specialty roasts. If you are in a high-volume household, recalibrate every six months. For those in humid environments, do it every three. Precision is a moving target. Stop guessing and start measuring.
How do I know if my burrs are touching?
You will hear a distinct metallic ‘chirp’ or high-pitched scraping sound. It is different from the hum of the motor. Stop immediately when you hear it.
Will calibrating void my warranty?
Adjusting the exterior dial or collar usually does not. However, opening the grind chamber and shimming the burrs with aluminum foil might. Check your manual before using tools.
How often should I recalibrate?
Ideally, every time you change your burr set or after a deep cleaning. For daily use, check the zero point every few months as the burrs wear down.
Can I calibrate while the grinder is off?
No. You must have the motor running to hear the burr contact point. Doing it while off risks jamming the burrs together and damaging the motor upon startup.