
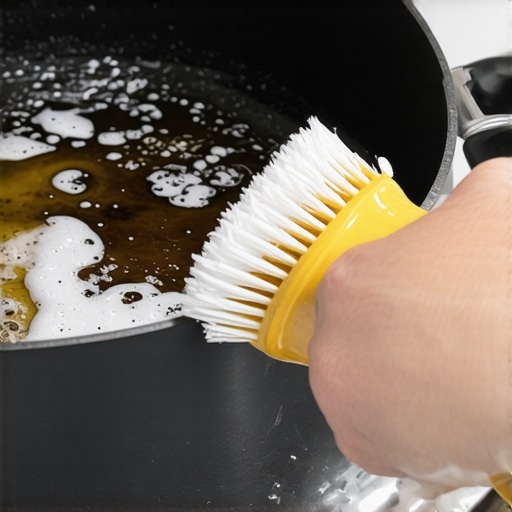
How to Remove Burnt-On Grease from the Bottom of Your Pan
Burnt-on grease is more than an eyesore. It is a thermal insulator that compromises the engineering of your high-end cookware. When lipids undergo polymerization at high temperatures, they transform from a liquid lubricant into a hard, plastic-like varnish. This obsidian-colored shell acts as a heat sink, forcing your burners to run longer and hotter to achieve the same internal temperature. After fifteen years in the luxury kitchen industry, I have seen five-hundred-dollar copper sauté pans rendered thermally inefficient by a mere millimeter of carbonized residue. The cost of ignoring this is not just aesthetic; it is an operational drain on your kitchen’s energy efficiency and the longevity of your equipment.
Thermal Dynamics of Carbonized Lipids
The science of a ruined pan bottom starts with the smoke point of your fats. When you sear at high temperatures, microscopic droplets of oil migrate to the exterior base. Exposed to direct flame or induction heat, these oils cross-link and bond to the metallic lattice. This creates a surface tension that standard dish soaps cannot break. In 3-ply and 5-ply constructions, this layer interferes with the aluminum or copper core’s ability to distribute heat evenly. You end up with hot spots. You end up with warped bases. Understanding why 3-ply cookware is better for most home cooks than 7-ply requires recognizing that thinner exterior layers are even more susceptible to this thermal choking. The rasp of a scouring pad against a scorched base is a sound of desperation, but without the right chemical intervention, that physical effort is largely wasted energy.
The Failure of Standard Scouring
Most home cooks reach for abrasive sponges or wire wool the moment they see discoloration. This is a mistake. Aggressive mechanical scrubbing on materials like polished stainless steel or copper creates micro-abrasions. These scratches increase the surface area of the metal, providing more ‘teeth’ for future grease to cling to. It is a cycle of degradation. I’ve watched clients destroy the finish on their heirloom pieces because they used the wrong grit. If you are dealing with enameled surfaces, the risk is even higher. One wrong move and you’re looking for the only way to fix a scratched enameled dutch oven rather than just cleaning it. We have to address the chemistry of the bond, not just the physical presence of the stain. You need a high-pH solution or a targeted acid-base reaction to liquefy the polymerized chains without compromising the structural integrity of the metal. The acrid scent of scorched canola oil should be your signal to stop cooking and start a restorative protocol.
Engineering a Restored Surface
For stainless steel, the solution lies in sodium bicarbonate and heat. Create a thick paste, apply it to the base, and introduce a small amount of moisture. The alkalinity begins to saponify the grease. For extreme cases, a professional degreaser containing sodium hydroxide is required, though this must be used with extreme caution on clad pans. Copper requires a different path—specifically an acidic medium like lemon juice mixed with salt to strip oxidation and grease simultaneously. We see a significant trend in the market where consumers are moving away from disposable pans. They are realizing why most healthy non-stick pans only last six months and are investing in professional-grade tools. Maintenance of these tools is a technical discipline. In our experience, the use of a specialized cleaning paste like Bar Keepers Friend (oxalic acid-based) is the industry standard for restoring the passivated layer of stainless steel. Referencing standards from the Cookware Manufacturers Association (cookware.org) and metallurgical data from ASM International (asmintl.org), it is clear that preserving the surface finish is the only way to maintain the specific heat capacity of the vessel.
Market Shift Toward Longevity
The local luxury market is shifting. We are seeing a move toward ‘lifetime’ kitchen kits. Clients are no longer satisfied with gear that fails after two years of heavy use. This means the ability to maintain the bottom of your pans is becoming a vital skill for the modern homeowner. In the next 24 months, expect to see more cookware brands offering their own proprietary restoration kits. The secondary market for high-end cookware is also growing. A well-maintained Mauviel or Hestan pan retains 70% of its value if the base is kept free of carbonization. Choosing the metal choice that prevents pitting in your soup pots is only half the battle; the other half is ensuring that the exterior remains as conductive as the day it left the factory.
The Executive Verdict
If your pan base is black, you are losing money every time you turn on the stove. My recommendation: Implement a monthly ‘strip and restore’ session for your primary sauté pans. Do not wait for the grease to become a thick crust. If you are using induction, a clean bottom is non-negotiable for proper magnetic coupling. If you are using gas, it prevents uneven flame spread. Stop scrubbing and start soaking. High-quality cookware is an investment in your home’s operational efficiency. Treat it like the precision instrument it is. Use a paste of baking soda and a drop of dish soap for light stains, and an oxalic acid cleaner for heavy polymerization. Avoid wire brushes at all costs. The result? A kitchen that performs at its peak engineering potential.
Frequently Asked Questions
Can I use oven cleaner on the bottom of my pans?
Only on pure stainless steel. Never use it on aluminum or non-stick surfaces as the high sodium hydroxide content will eat into the metal and cause permanent pitting.
Does a burnt bottom affect cooking time?
Yes. Carbonized grease acts as an insulator, reducing the rate of heat transfer from the burner to the food, which can lead to longer preheat times and uneven results.
Why does my pan bottom keep getting greasy?
This is usually due to ‘oil creep’ from the inside or splatters from neighboring pans. Wiping the exterior of your pan before it hits the heat is the best preventative measure.