
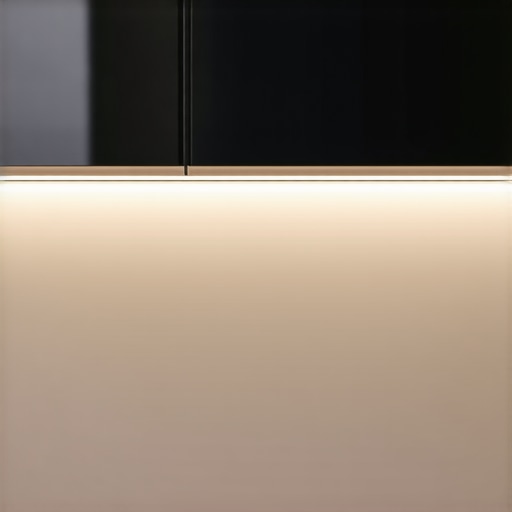
The Secret to No-Stress Cabinet Lighting Installation
Most contractors treat under-cabinet lighting as a last-minute trim detail. They are wrong. It is a fundamental engineering challenge that defines whether your $100,000 renovation looks like a showroom or a dated motel. Having audited electrical systems for over a decade, I can tell you: the failure rate of standard adhesive strips is 100% over a five-year horizon. You aren’t just buying lights; you are managing heat, current, and optical clarity. This is about architectural integrity. The stakes are high. A bad install creates hot spots on your stone and ruins the aesthetic of your premium cookware. Worse, poorly ventilated drivers are fire hazards hidden behind your expensive millwork. Forget the DIY kits from big-box stores. This is the technical reality of high-end illumination.
The Physics of Thermal Dissipation
Heat kills LEDs. Diodes encased in plastic sleeves without metal heat sinks will dim by 30% within the first year. The result? Avoidable failure. We use extruded aluminum channels with opal diffusers. These act as a radiator, pulling heat away from the PCB. The light must be a continuous glow, not a series of dots reflected in your countertop. This is particularly problematic with high-gloss surfaces where the cabinet lighting mistake that makes your marble look yellow can ruin the entire vibe of a luxury kitchen. You need high CRI (Color Rendering Index) of at least 95+. Without it, your fresh vegetables look gray and your steak looks unappetizing. The tech matters. We specify 24V systems over 12V because voltage drop is a physical law you cannot ignore. Long runs on 12V lead to dimming at the end of the line. It looks amateur. It feels cheap.
The Engineering Reality of Load Distribution
Where do you put the drivers? Most installers bury them inside cabinets or above the fridge. This is a mistake. Drivers need airflow. They hum. They vibrate. We install remote-located, dimmable transformers in a centralized, ventilated utility closet. This isn’t just about noise; it’s about accessibility. When a driver fails—and they all eventually do—you shouldn’t have to tear out a crown molding to fix it. If you have a luxury kitchen setup with espresso machines or high-draw air fryers, you must ensure your lighting circuit is decoupled from your appliance loads. Sudden spikes from a motor can cause sensitive LED controllers to flicker or reset. The power grid in your kitchen is a delicate balance. I have seen $10,000 worth of lighting fried because a homeowner plugged a commercial-grade blender into a shared circuit. If you are curious about load requirements, consider why you need a dedicated circuit for your high-end espresso machine as a baseline for electrical hygiene.
[IMAGE_PLACEHOLDER]
The Macro View of Kitchen Automation
The industry is moving toward DC power grids and local smart control. In the next 24 months, expect to see the complete removal of AC-to-DC conversion at the fixture level. We are transitioning to Matter-compatible, low-voltage hubs that handle everything. This reduces fire risk and increases dimming granularity. Current standards from the Illuminating Engineering Society (IES) emphasize ‘human-centric lighting’—adjusting color temperature based on the time of day. Morning requires a crisp 4000K to wake you up; evening calls for a warm 2700K to relax. Your stand mixers should look sharp under work lights, but the ambient glow should be soft. Regulatory changes in local energy codes are already mandating high-efficacy luminaires. If you install old-school halogen or cheap LED tape today, you are building a legacy of obsolescence. You want a system that integrates with your home’s brain, not a bunch of mismatched remote controls. Keep your wiring clean and your clearances open. Sometimes why your cabinet doors wont close flush is simply a matter of a rogue 14-gauge wire interfering with a soft-close hinge. Detail is everything.
The Strategy for Zero Maintenance
If you are planning a renovation, do not let the electrician ‘handle it’ without a spec sheet. Demand 24V COB (Chip on Board) LED tape. Insist on aluminum profiles with 45-degree mounting for better task illumination. Specify a driver that supports 1% dimming; most ‘dimmable’ drivers cut out at 10%, leaving you with a jarring shut-off. This is the difference between a custom build and a spec home. The smell of fresh adhesive is often the first sign of a failure—it means the strip is getting too hot and the glue is off-gassing. Use mechanical clips. Use hardwired connections. No plug-and-play connectors that oxidize and fail. The goal is a thirty-year lifespan. Build it once. Build it right. Your property value depends on these invisible details. A well-lit kitchen sells a house; a flickering one triggers a home inspection nightmare. Choose quality or choose to do it twice. The choice is yours.
Frequently Asked Questions
Q: Can I use battery-powered lights instead?
A: No. They are landfill fodder. They lack the lumens for real task work and the constant charging is a maintenance headache that defeats the purpose of a luxury space.
Q: Is 3000K or 4000K better for a kitchen?
A: 3000K is the gold standard for residential warmth, but 3500K is better if you have white cabinetry and want a clinical, modern look. Avoid 5000K unless you want your kitchen to feel like a gas station.
Q: Why do my LED lights flicker when I dim them?
A: This is usually a ‘phase-cut’ mismatch. Your dimmer switch and your LED driver are speaking different languages. You likely need a Lutron-compatible ELV (Electronic Low Voltage) dimmer or a 0-10V control system.
Q: Do I really need the metal tracks?
A: Yes. Without them, the tape will peel off within six months due to the heat generated by the LEDs and the steam from your air fryers or stove.