
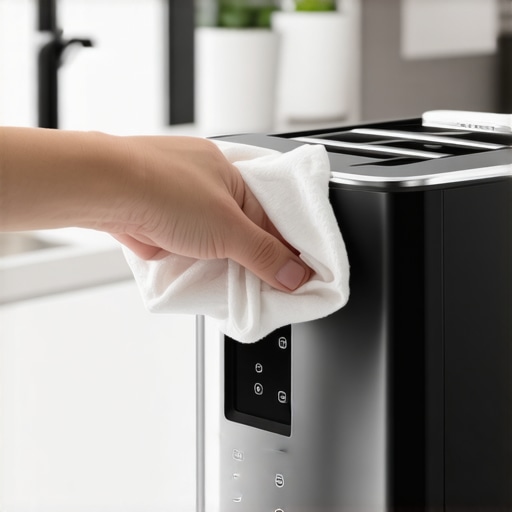
How to Clean Your Smart Toaster Without Breaking the Sensors
Owning a high-end smart toaster is an exercise in managing delicate circuitry shielded by stainless steel. If you treat a $400 touchscreen appliance like a vintage mechanical slot-loader, you are effectively countdown-clocking its demise. Most homeowners assume the risk is fire, but for the modern luxury kitchen, the real threat is sensor occlusion and capacitive failure. After a decade of diagnosing equipment failures in premium domestic environments, I have seen more units bricked by Windex than by burnt crusts. Precision requires a dry-process methodology. You cannot saturate these machines.
The Engineering Fragility of Modern Heating Units
Traditional toasters use simple nichrome wire and a bimetallic strip. Modern smart variants utilize infrared thermopiles and PID (Proportional-Integral-Derivative) controllers to calculate the exact surface temperature of your sourdough. These sensors sit behind specialized glass or open apertures inside the chassis. When carbonized debris or aerosolized oils from nearby air fryers settle on these lenses, the toaster loses its ability to ‘see’ the bread. The result? Uneven browning or a total refusal to engage the heating cycle. Much like why your smart kitchen scale keeps disconnecting from your phone, electronic interference in the kitchen is often a matter of environmental contamination rather than software bugs.
The cost-benefit of proper maintenance is clear. A sensor replacement on a prosumer model often exceeds 60% of the original MSRP. You aren’t just cleaning; you are protecting a logic board. When you look inside, you might see a faint blue glow or a small glass bead near the top. That is your infrared eye. Touch it with a greasy finger, and you’ve created a localized heat trap that will eventually crack the sensor lens. The hardware demands a level of respect usually reserved for espresso machines or high-accuracy stand mixers. Proper care follows the standards set by the National Fire Protection Association for electrical appliance safety while respecting the delicate nature of microelectronics.
The Precision Maintenance Protocol
Step one: Total power isolation. Pull the plug. Do not rely on the ‘off’ button. Capacitive touchscreens can still hold a charge, and a static discharge from a cleaning brush can scramble the firmware. Flip the unit over and clear the crumb tray. This sounds elementary, yet I frequently find trays so packed that the internal airflow is restricted, causing the premium cookware-grade exterior to overheat. If you notice the hidden switch that fixes your smart oven connectivity issues is similar to the reset protocols on these toasters, it’s because they share the same architectural DNA.
Avoid canned air. The liquid propellant can spray out in cold bursts, thermally shocking the hot sensors and leaving a chemical residue that is nearly impossible to remove. Use a soft-bristled silicon pastry brush to dislodge particles from the heating elements. For the sensors, a dry, optical-grade microfiber cloth is the only tool allowed. If there is stubborn grease, a single drop of 99% isopropyl alcohol on a swab—never sprayed—will suffice. This mirrors the caution needed when you how to descale your espresso machine without damaging the internals; the chemicals must be targeted, never systemic.
Risks of Component Degradation
The messy reality of a working kitchen is that oil is everywhere. If your toaster sits near a range where you use premium cookware for high-heat searing, those microscopic oil droplets are being pulled into the toaster’s cooling vents by its internal fans. I once saw a unit where the internal PCB (Printed Circuit Board) was coated in a sticky yellow film. The owner wondered why the touchscreen felt ‘mushy.’ The oil had compromised the capacitive layer. The smell of hot grease and the ‘clack’ of a struggling solenoid are your early warning signs. Failure to act results in a permanent ‘Error 401’ on your OLED display.
The Strategic Maintenance Outlook
The industry is moving toward even more integrated sensors, including internal cameras for AI-based browning detection. In the next 12 months, we expect to see more ‘closed-loop’ systems that will be even harder to service. Regulatory shifts regarding ‘Right to Repair’ are slowly catching up, but for now, these units remain black boxes. Protecting the interface is your primary objective. Ensure your luxury kitchen is equipped with the best countertop material for heavy kitchen appliances to provide a stable, vibration-free base, which prevents sensor misalignment during high-intensity use.
The Executive Verdict
If your smart toaster costs more than a standard microwave, treat it like a computer. Execute a dry-brush cleaning every 30 days. Maintain a strict ‘no-spray’ zone within two feet of the device. If the sensors begin to lag, check for physical obstructions before attempting a software reset. Invest in a dedicated electronics cleaning kit. It is cheaper than a replacement unit.
Frequently Asked Questions
Can I use a vacuum to suck out the crumbs?
Only if it has a plastic nozzle and you don’t touch the internal wires. Metal vacuum attachments can create static discharge or bend the delicate heating ribbons.
Why is the touchscreen on my toaster unresponsive?
This is usually due to a build-up of kitchen grease or ‘ghost touches’ caused by electromagnetic interference from nearby unshielded appliances. Clean the screen with a dry microfiber cloth and power cycle the unit.
Is it safe to use a damp cloth on the exterior?
Only if the cloth is slightly damp with water, never dripping. Ensure no moisture migrates toward the vents or the charging ports of the smart interface.
How often should I deep clean the internal sensors?
In a high-use kitchen, every three months. If you toast items with high sugar content like pastries, increase this to once a month to prevent carbonized build-up.